How to Transfer a Nucleus Colony (Nuc) into a Full-Sized Hive
Step-by-Step Instructions for a Smooth and Successful Move
Transferring a nucleus colony into a full-sized hive is a key milestone in your beekeeping journey. Whether you're just starting out or refreshing your process, this guide will walk you through the steps I personally use to ensure a calm, controlled transition—for both you and the bees.
🎥 Prefer to watch the process? We’ve got a step-by-step video tutorial showing exactly how to carry out this transfer—check it out at the end of this blog!
🧰 What You’ll Need:
-
Nucleus colony (nuc)
-
Full-sized hive (complete with brood box, crownboard, and roof)
-
Protective gear
-
Hive tool
-
Smoker (optional, but useful)
-
1 litre of 1:1 sugar syrup
-
Feeder (frame or contact feeder)
🔄 Step-by-Step Process:
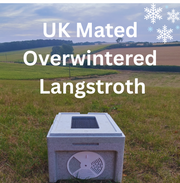
1. Place the Nuc in the Exact Location of the Hive
This is crucial. Bees orient themselves based on location, so placing the nuc where the hive will permanently sit helps avoid confusion during the transfer.
2. Cover the Ventilated Roof
Use plastic, wood, or a dedicated roof for Paynes poly nucs to prevent robbing and to help the bees settle without exposure to wind or excess light.
3. Let the Bees Settle
Wait 30 minutes before opening the entrance. This gives the bees time to calm down and prevents them from tumbling out in a panic when the door is opened.
4. Leave the Nuc for 24 Hours
Give the foragers time to orientate to their new home base. This helps reduce stress and prevents bees from drifting back to the previous location if they were recently moved.
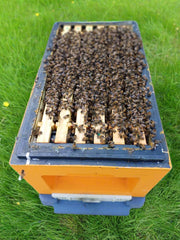
5. Transfer Frames One by One
Carefully lift each frame from the nuc and place it into the hive. Be mindful not to roll or crush bees, especially around the brood nest. Take your time—this isn’t a job to rush.
6. Maintain Frame Order and Orientation
Place the frames in the same order and facing the same direction as they were in the nuc. This helps the bees maintain their structure and organization.
7. Add Undrawn Frames
Once all nuc frames are in, add your remaining undrawn frames to fill out the hive box. These will become the bees' new expansion space.
8. Gently Tap Out Remaining Bees
Tap any lingering bees from the nuc box into the hive to make sure no one gets left behind. Don’t worry about the queen here—she’ll usually be on a frame, but even if you don’t spot her, just make sure all the bees make it in.
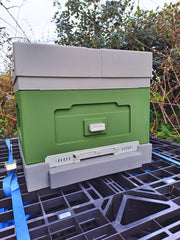
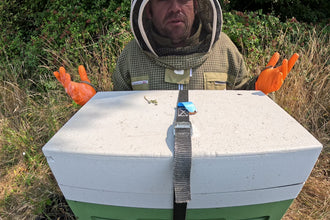
9. Place the Crownboard and Roof
Once all frames and bees are in, close the hive with a crownboard and roof to help regulate temperature and humidity.
10. Feed 1 Litre of 1:1 Sugar Syrup
Encourage the colony to draw out the fresh frames by feeding 1:1 sugar syrup. This gives them the resources they need to build comb and settle into their new home.
11. Leave for One Week Before Inspecting
Let the colony adjust and work undisturbed. Avoid the temptation to peek—give them space for about a week before your next inspection.
🐝 Final Tip: You Don’t Need to Find the Queen
Don't stress if you don’t spot her during the transfer. The important part is that every bee makes it from the nuc into the hive safely. As long as she’s in there, the colony will get on just fine.
🎬 Watch the Process in Action
Want a visual walkthrough? Watch our full video guide on how to transfer a nucleus colony into a full-sized hive—embedded below. Perfect for beginners or anyone needing a quick refresher.
Learn how to prepare bees for winter in the UK. Feeding, varroa control, insulation & our proven step-by-step ...
Wondering when to start beekeeping in the UK? The best time depends on whether you choose an overwintered, spring,...
Learn how to transfer a nucleus colony (nuc) into a full-sized hive with this step-by-step guide. From prepping yo...
How to Buy Bees: Swarm, Package, or...

In this episode, we dive into all the must-have tools every begin...

11 Things to Consider Before You Start Beekeeping | Beekeeping From Day 1